How To Uninstall WordPress From HostGator
Step by step guide to uninstall WordPress from HostGator. There are a few steps you must pass to Uninstall WordPress.
Please read step by step process with attached screenshots. This will be very helpful for you to understand how to uninstall WordPress from HostGator.
The first step you must log in to the HostGator cPanel dashboard.
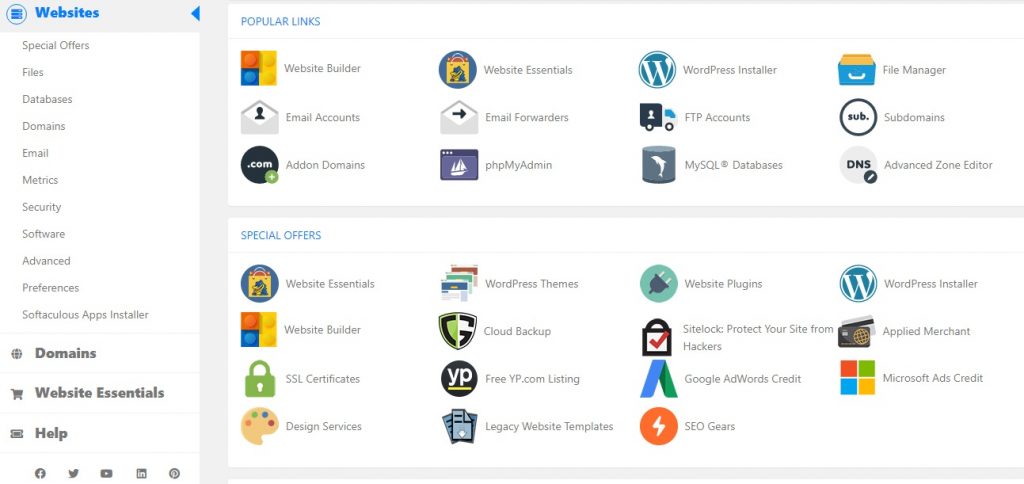
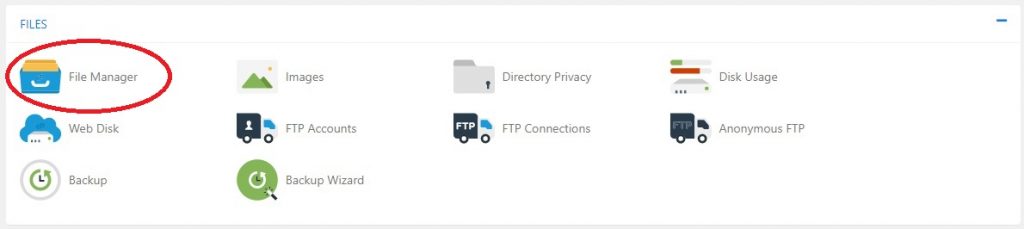
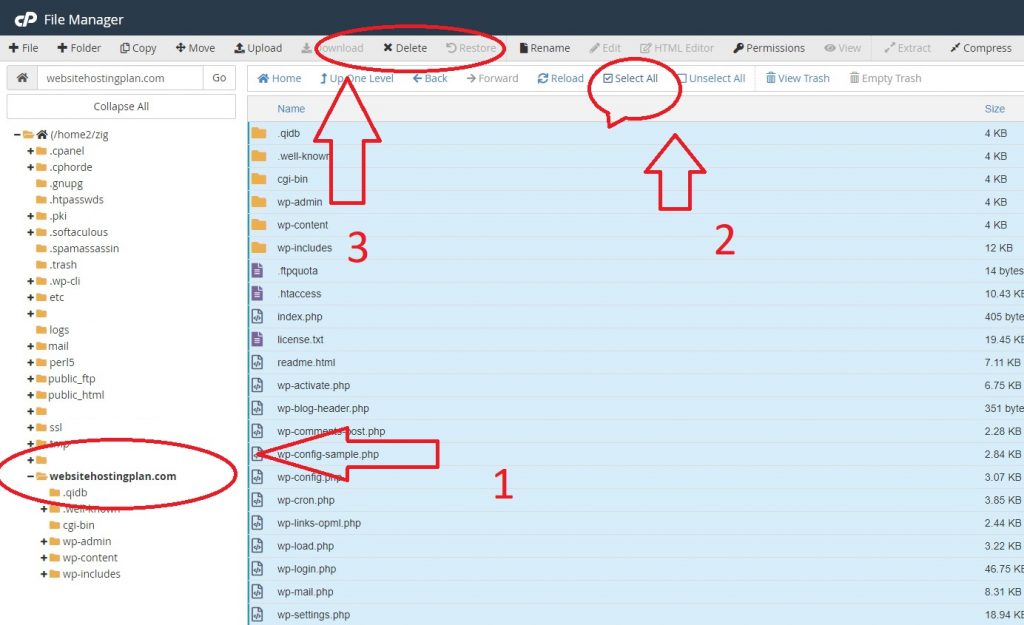
Go to the File section and click on File Manager to continue with Uninstalling WordPress, as I attached the below image.
You will now on the file manager setting page where you should have to change all the settings to uninstall WordPress from cPanel.
You have to find the domain name with the Folder associated with your WordPress account that you want to delete from the HostGator. Click on the Folder to Continue Uninstall WordPress.
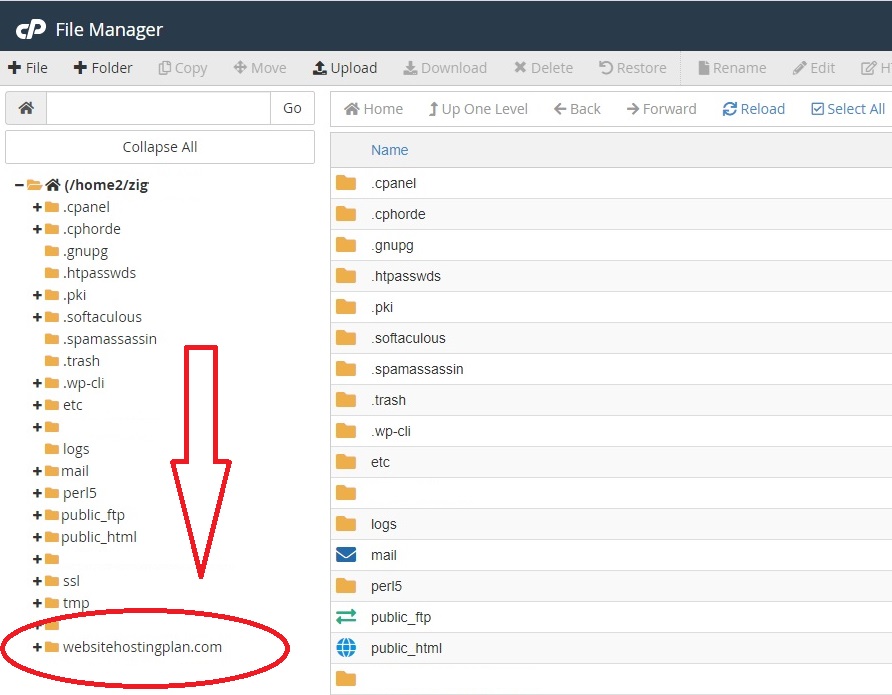
Once you click on the Folder, you have to Select All according to my guide as attached screenshot.
As a next step, you have to click on the Delete in the Manu bar. Then all the folders will delete associate with your WordPress account.
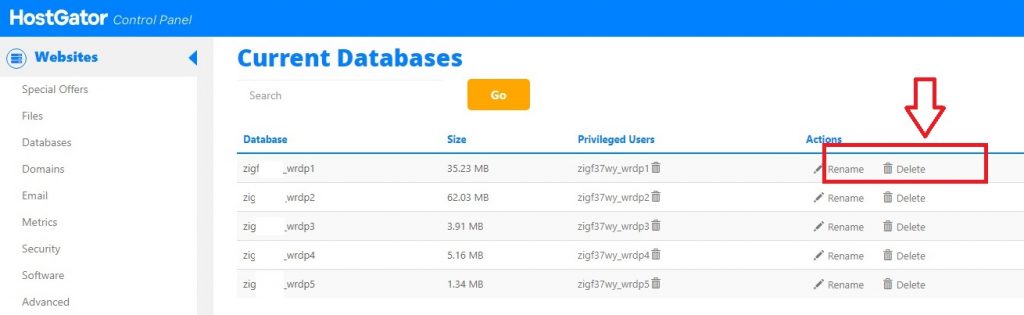
When you finish deleting all the folders, you must go back to the HostGator cPanel dashboard and find the Database section.
Once you enter the Database section, select the MySQL Databases.

Once you open the Current Databases section, you will see the list of all the databases you belong to with the HostGator hosting account.
Click on the Delete to Continue uninstalling WordPress from HostGator.
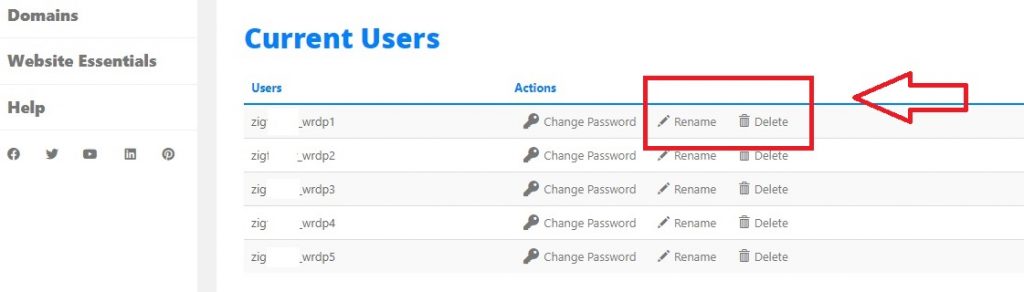
Once you do delete, scroll down, and you will see the Currant Users. Delete the user for the database you have Deleted.
Now you have completely Uninstalled WordPress from HostGator manually.